Physical Address
304 North Cardinal St.
Dorchester Center, MA 02124
Physical Address
304 North Cardinal St.
Dorchester Center, MA 02124

This Laravel jQuery POS installation guide walks you through installing Laravel and essential packages. Let’s set up your project in just a few quick steps.
In this step, we’ll begin by setting up the development environment. You’ll learn how to install Laravel, jQuery, and other essential packages required to build a fully functional Laravel jQuery POS. This will lay the groundwork for the entire POS system we’ll create throughout the series.
You can follow along using any operating system—whether it’s Windows, Linux, Ubuntu, or macOS. You’re also free to choose any local development stack such as XAMPP, WAMP, or LAMP. For this tutorial, we’ll be using WAMP Server on Windows because it’s easy to configure and beginner-friendly.
By the end of this part, you’ll have a Laravel app set up with the necessary frontend libraries and tools—ready to move on to the next stage of your Laravel jQuery POS project.
You can learn how to install it from the official Laravel docs, check out our earlier tutorial How to Install Laravel Framework 12.x on Windows, or just follow the step-by-step instructions below.
For this tutorial, we’ll assume that you already have Composer and Node.js installed, and you’re running WampServer on port 80. Your Laravel project is located in D:\www, and the project folder is named laravel-jquery-pos.
Open the Command Prompt (CMD), navigate to your project root directory, and run the following command:
composer global require laravel/installer
laravel new laravel-jquery-pos


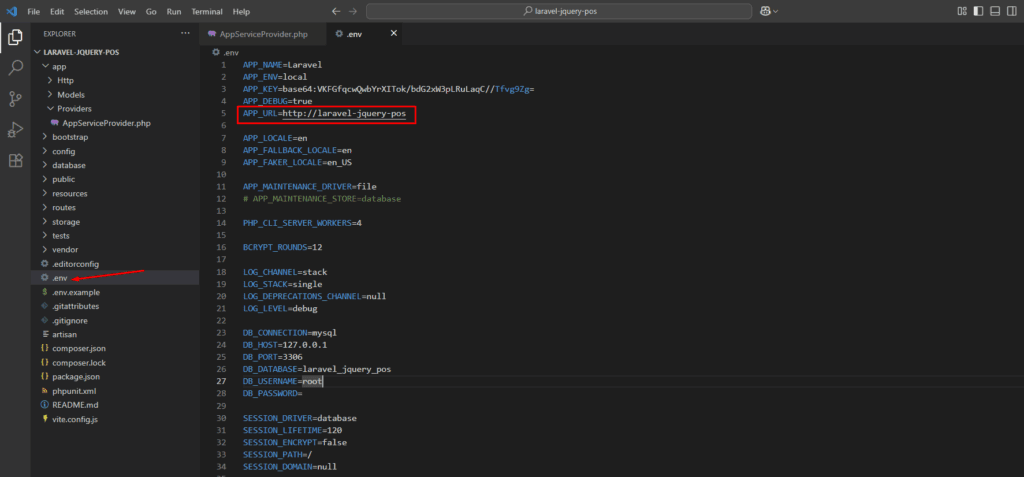
Configure your Laravel project to connect with MySQL using the .env file

Then create the database manually or with your preferred GUI.
Update this file app/Providers/AppServiceProvider.php follow the screenshot below to avoid database migration issues.

Open the Command Prompt (CMD), navigate to your project root directory, and run the following command:
php artisan migrate:fresh
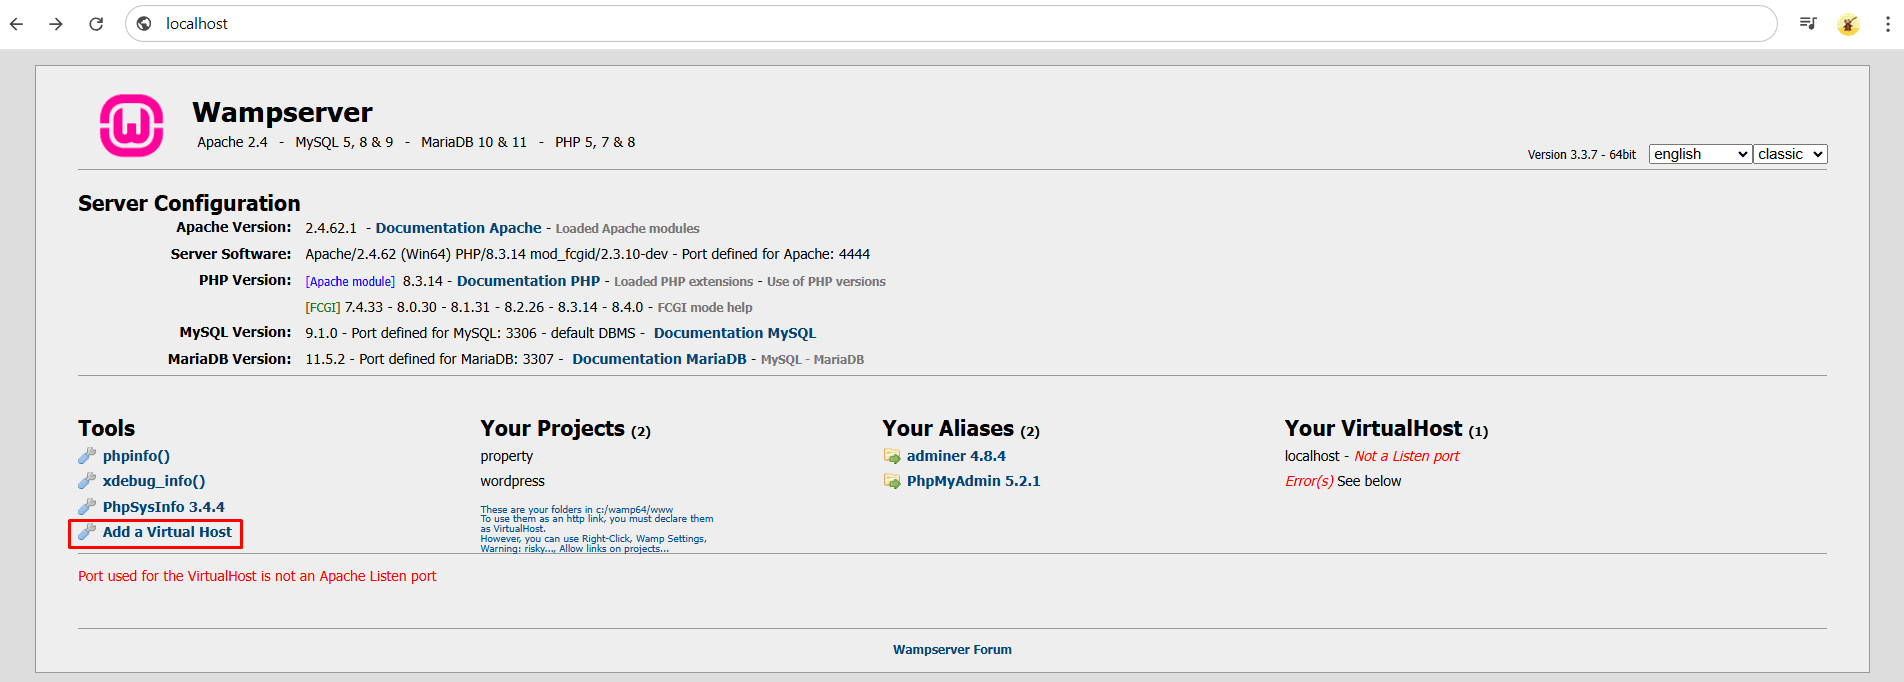
Ensure the WAMP server is running, then open your browser and navigate to http://localhost.


After creating the virtual host, open the .env file and update the APP_URL value to match the virtual host name you just configured.

As these libraries are required for our project, please proceed with installing them
npm install vite apexcharts bootstrap bootstrap-icons flatpickr jquery print-js xlsx-populateRun this command to compile your assets and launch the project in development mode.
npm run devNext, restart the WAMP server, then open your browser and go to http://laravel-jquery-pos.

Congratulations! 🎉 You’ve just completed the first step of building your Laravel POS with jQuery system. At this point, you’ve successfully installed Laravel 12.x, configured your environment, and added all the essential packages needed for the project.
In the next tutorial, we’ll move on to designing the layout using the NiceAdmin Bootstrap template. You’ll learn how to structure your views, set up reusable components, and start giving your POS system a clean, professional UI.
👉 Continue to Part 2: Integrate NiceAdmin Template into Laravel Project