Laravel jQuery POS tutorial for beginners – this guide helps you build a complete POS system from scratch using Laravel and jQuery. It’s beginner-friendly, practical, and hands-on.
If you’re just starting out with Laravel, jQuery, or Bootstrap, you’re probably wondering:
“How do I actually build something real with these tools?”
You’re not alone. Many beginners learn the basics but feel stuck when it comes to building a full system. That’s why I created this Laravel jQuery POS tutorial for beginners—to help you combine all the key components into one working project.
This guide will walk you through building a simple but complete POS (Point of Sale) system from scratch. We’ll use Laravel for the backend, Bootstrap for styling, and jQuery for front-end interactivity. Whether you’re a student or a self-learner, this is a great first full-stack project to add to your portfolio.
Table of Contents
What You’ll Build
In this Laravel jQuery POS tutorial for beginners, you’ll build a complete Point of Sale (POS) system from scratch using Laravel 12, jQuery, and Bootstrap.
This project will help you understand how to manage products, handle transactions, and process sales efficiently — all within a real-world web application.
By the end of this Laravel jQuery POS tutorial for beginners, you’ll have a working POS system ready to customize and expand.
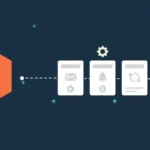
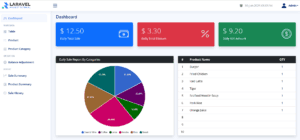
Here’s a sneak peek at what the finished Laravel POS system looks like:
🖼️ POS System Dashboard
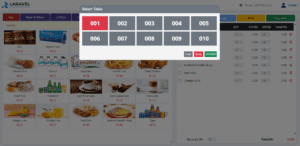
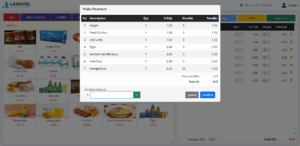
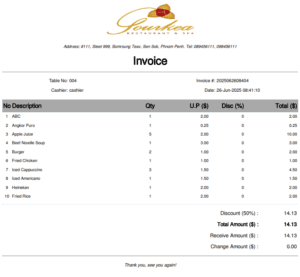
🛒 POS Screen with Cart and Checkout
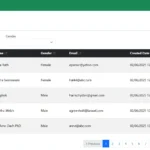
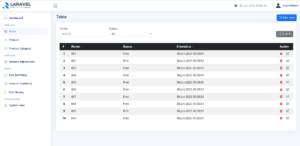
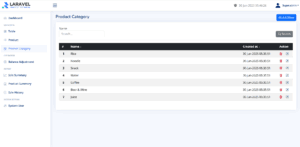
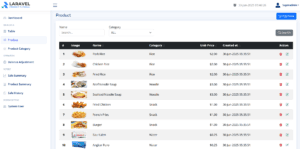
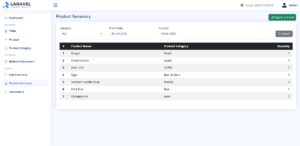
📦 Product Management (CRUD)
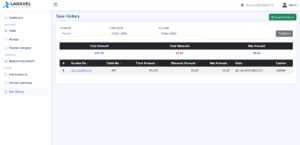
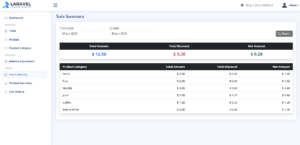
📊 Sales Report with Excel Export
Tools and Libraries We’ll Use
This Laravel jQuery POS tutorial for beginners uses modern development tools to help you learn full-stack web development step by step.
- Laravel – The main PHP framework for backend logic
- Bootstrap 5 – For building responsive and modern UI
- Bootstrap Icons – For clean and lightweight icons
- jQuery – For DOM interaction and Ajax functionality
- xlsx-populate – To export sales reports to Excel
- print-js – To print receipts and invoices
- flatpickr – A modern, user-friendly date picker
- apexcharts – For visualizing sales reports
- NiceAdmin – A free, responsive admin template based on Bootstrap
These tools will help you create a professional and fully functional Laravel jQuery POS tutorial for beginners without being overly complex.
Features of the POS System
Our Laravel jQuery POS tutorial for beginners covers key features every POS system needs — including inventory management, customer handling, and daily sales reports.
You’ll also learn to integrate role-based access for admin and cashier users.
This Laravel jQuery POS tutorial for beginners is designed to teach both backend logic and frontend interactivity with clear, working examples.
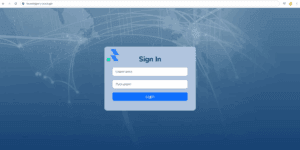
- 👥 Login and user authentication (with roles: Admin & Cashier)
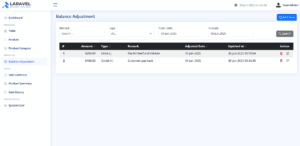
- 🗃️ CRUD for Products, Categories, Table List, Balance Adjustments, System Users
- 🛒 Shopping cart and order system
- 🔐 Middleware to restrict access between Admin and Cashier
- 📊 Sales reports with Excel export
- 📈 Dashboard graphs using ApexCharts
- 📆 Date filtering using Flatpickr
- 🧾 Receipt printing using print-js
- 💻 Admin interface built with NiceAdmin
This Laravel jQuery POS tutorial for beginners is perfect for beginners who want to build something useful and real-world.
Step-by-Step Tutorial Overview
We’ll cover the full process step by step:
- Install Laravel and Required Packages
Get your environment ready and install Bootstrap, jQuery, and more. - Design the Layout with NiceAdmin
Use the free NiceAdmin Bootstrap template to structure the admin UI. - Data Migration and User Authentication
Enable login, logout, and role-based access control. - Ajax Menu Navigation and System Data (CRUD)
Create smooth navigation and manage key POS data with simple Ajax-based CRUD features. - Build a Shopping Cart and Order Flow
Use jQuery to update cart items and Laravel to process orders. - Use Middleware for Role Separation
Prevent cashiers from accessing admin-only features. - Generate Reports and Export to Excel
Filter sales data by date and export with xlsx-populate. - Create Dashboard Charts
Show sales trends visually with ApexCharts.
Why This Laravel POS System is Great for Beginners
- ✅ It’s simple, but covers all CRUD, logic, and UI fundamentals
- ✅ It uses beginner-friendly libraries
- ✅ It helps you understand how backend and frontend connect
- ✅ It’s easy to extend and customize
- ✅ It’s a complete project you can proudly add to your portfolio
You don’t need to be an expert to follow this—just basic knowledge of Laravel and jQuery is enough.
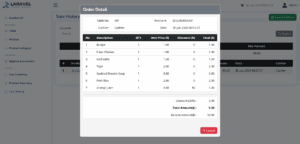
Preview of What You’ll Build
In this tutorial series, we’ll create a complete and fully functional POS (Point of Sale) system using Laravel, Bootstrap, and jQuery—step by step.
Before we dive into the code, here’s a quick look at the final result. The screenshots below show the exact system you’ll be able to build by following along, including features like user login, product management, cart and checkout, reporting, and more.


Conclusion
If you’re looking for a beginner-friendly Laravel jQuery POS tutorial for beginners project to build your skills and confidence, this tutorial is made for you. You’ll learn how to combine all the tools you’ve studied into one working application—with real features and practical use cases.
By the end of the series, you’ll have a complete POS system you built yourself—something functional, impressive, and ready to show off.
👉 Let’s start Part 1: Install Laravel and Required Packages
Laravel jQuery POS Tutorial for Beginners Series
This step-by-step series will guide you through building a complete Laravel jQuery POS system from scratch:
- Part 1: Install Laravel and Required Packages
Set up Laravel 12.x, jQuery, Bootstrap, and essential dependencies to get your project started. - Part 2: Integrate NiceAdmin Template into Laravel
Design a clean and responsive UI using the NiceAdmin Bootstrap template. - Part 3: Data Migration and Authentication
Implement user login, logout, and role-based access control. - Part 4: Ajax Menu Navigation and System Data (CRUD)
Create smooth navigation and manage key POS data with simple Ajax-based CRUD features. - Part 5: Build the POS Cart System with jQuery
Add products to cart, adjust quantities, and calculate totals with jQuery. - Part 6: Role-Based Access – Admin vs. Cashier
Create middleware to manage access between different user roles. - Part 7: Generate Reports and Filter Sales Data
Show daily sales, filter by date, and export reports using xlsx-populate. - Part 8: Create Graph Reports with ApexCharts
Visualize sales performance using beautiful charts on the dashboard.