Setting up a modern Laravel development environment becomes incredibly easy with Laravel Sail, the official lightweight Docker tool for Laravel projects. In this complete Laravel Sail tutorial, you will learn what Laravel Sail is, why you need it, and how to configure Sail for a Laravel + Vue.js SPA project. We’ll also show you the essential commands every developer must know when working with Laravel Sail.
Table of Contents
What is Laravel Sail?
In this part of the Laravel Sail tutorial, you’ll learn that Laravel Sail is a built-in Docker environment included with Laravel to help developers run PHP, MySQL, Redis, and Node.js without installing anything manually. Sail provides a simple command-line interface that makes Docker easy even for beginners.
Why Do We Need Laravel Sail?
This section explains why developers choose Sail. Using the focus keyword Laravel Sail Tutorial, you’ll understand the benefits such as:
- No need to install PHP, MySQL, or Composer locally
- Perfect for teams because everyone uses the same environment
- Easy to set up Node.js for compiling Vue.js SPA
- Runs on Windows, macOS, and Linux with equal performance
- Fully powered by Docker but simplified with a single command:
./vendor/bin/sail
Step 1: Install Docker on Your Operating System
In this Laravel Sail Tutorial, the first step is installing Docker on Windows, macOS, or Linux. Docker provides the clean container environment Sail needs to run Laravel smoothly.
🔹Windows
- Go to the official Docker download page.
- Download Docker Desktop for Windows.
- Make sure your system meets requirements:
- Windows 10/11 (64-bit)
- WSL 2 enabled
- Run the installer and follow the setup wizard.
- After installation, restart your computer if prompted.
- Open Docker Desktop → ensure it shows “Running” at the bottom.
🔹macOS
- Visit the Docker download page.
- Download Docker Desktop for Mac (choose Intel or Apple Silicon version).
- Drag the Docker icon into your Applications folder.
- Open Docker Desktop and allow required permissions.
- Wait until the status changes to “Docker is running”.
🔹Linux (Ubuntu Example)
Open your terminal and run the following:
sudo apt update
sudo apt install ca-certificates curl gnupg lsb-release
Add Docker’s official GPG key:
sudo install -m 0755 -d /etc/apt/keyrings
curl -fsSL https://download.docker.com/linux/ubuntu/gpg | sudo gpg --dearmor -o /etc/apt/keyrings/docker.gpg
sudo chmod a+r /etc/apt/keyrings/docker.gpg
Set up the stable repository:
echo \
  "deb [arch=$(dpkg --print-architecture) signed-by=/etc/apt/keyrings/docker.gpg] \
  https://download.docker.com/linux/ubuntu \
  $(lsb_release -cs) stable" | \
  sudo tee /etc/apt/sources.list.d/docker.list > /dev/null
Install Docker packages:
sudo apt update
sudo apt install docker-ce docker-ce-cli containerd.io docker-buildx-plugin docker-compose-plugin
Verify installation:
docker --version
docker compose version
Now that Docker is installed and running on your system, you can continue with the next steps to set up your Laravel Vue SPA Docker environment.
Step 2: Add Laravel Sail to an Existing Laravel Project
In this part of the Laravel Sail Tutorial, you’ll install Sail into your current Laravel application so you can run it inside Docker. If you previously followed my guide on Laravel 12 Vue 3 Session Based Authentication, you can continue using that same project and simply add Sail to enable a full containerized development environment.
Go to your Laravel project folder (existing project!)
cd C:\laravel\laravel-sail-vue-spaInstall Laravel Sail into your project
composer require laravel/sail --devGenerate default Docker files
php artisan sail:installWhen it asks which services → choose mysql, redis (or any you need).
This command will create a file inside your project: compose.yaml. And you can edit the file content base on your requirements.
services:
    laravel.test:
        build:
            context: './vendor/laravel/sail/runtimes/8.4'
            dockerfile: Dockerfile
            args:
                WWWGROUP: '${WWWGROUP}'
        # image: 'sail-8.4/app'
        extra_hosts:
            - 'host.docker.internal:host-gateway'
        ports:
            - '8002:80'
            - '${VITE_PORT:-5173}:${VITE_PORT:-5173}'
        environment:
            WWWUSER: '${WWWUSER}'
            LARAVEL_SAIL: 1
            XDEBUG_MODE: '${SAIL_XDEBUG_MODE:-off}'
            XDEBUG_CONFIG: '${SAIL_XDEBUG_CONFIG:-client_host=host.docker.internal}'
            IGNITION_LOCAL_SITES_PATH: '${PWD}'
        volumes:
            - '.:/var/www/html'
        networks:
            - sail
        depends_on:
            - mysql
    mysql:
        image: 'mysql/mysql-server:8.0'
        ports:
            - '33062:3306'
        environment:
            MYSQL_ROOT_PASSWORD: '${DB_PASSWORD}'
            MYSQL_ROOT_HOST: '%'
            MYSQL_DATABASE: '${DB_DATABASE}'
            MYSQL_USER: '${DB_USERNAME}'
            MYSQL_PASSWORD: '${DB_PASSWORD}'
            MYSQL_ALLOW_EMPTY_PASSWORD: 1
            MYSQL_EXTRA_OPTIONS: '${MYSQL_EXTRA_OPTIONS:-}'
        volumes:
            - 'sail-mysql:/var/lib/mysql'
            - './vendor/laravel/sail/database/mysql/create-testing-database.sh:/docker-entrypoint-initdb.d/10-create-testing-database.sh'
        networks:
            - sail
        healthcheck:
            test:
                - CMD
                - mysqladmin
                - ping
                - '-p${DB_PASSWORD}'
            retries: 3
            timeout: 5s
networks:
    sail:
        driver: bridge
volumes:
    sail-mysql:
        driver: local
Update MySQL database connection in .env
DB_CONNECTION=mysql
DB_HOST=mysql
DB_PORT=3306
DB_DATABASE=laravel_vuejs_pos
DB_USERNAME=dbusername
DB_PASSWORD=dbpassword
Step 3: Run Your Project with Sail
Here, the Laravel Sail Tutorial explains how to start your application using simple Sail commands, letting you run Laravel, MySQL, and other services inside Docker.
Open your Terminal/CMD, go to the project’s root folder, and then run the command below:
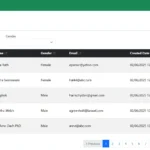
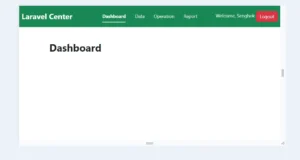
./vendor/bin/sail up -d./vendor/bin/sail artisan migrate --seednpm run devOpen your browser and run
http://localhost:8002
Optional: Important Note for Windows Users Using Docker Desktop
If you are running Windows, Laravel Sail may not work properly inside Docker Desktop unless you have a Linux environment installed.
This is because many Sail commands — such as ./vendor/bin/sail up, ./vendor/bin/sail artisan, and ./vendor/bin/sail composer — require a real Linux shell, not PowerShell or CMD.
Docker Desktop on Windows still relies on Windows paths and permissions, which can cause issues like:
- Sail commands not executing
- Permission or ownership errors
- Bind mount errors
- Git safe directory warnings
- Missing
/bin/bashinside container
To fix this, you must install Ubuntu and run Laravel Sail from inside a Linux shell, not PowerShell.
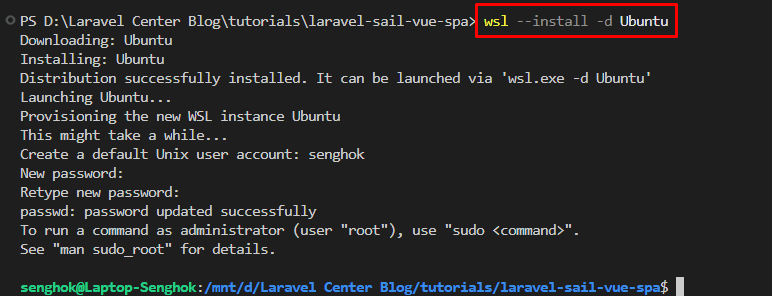
Open PowerShell or Command Prompt as an administrator and run the following command to install the latest Ubuntu distribution
wsl --install -d Ubuntu(This will download, install, and prompt you to create a Unix username and password.)
After the installation completes, run the list command again to see your options
wsl --list --verboseRun this command to change the default from docker-desktop to your new Linux distribution
wsl --set-default Ubuntu
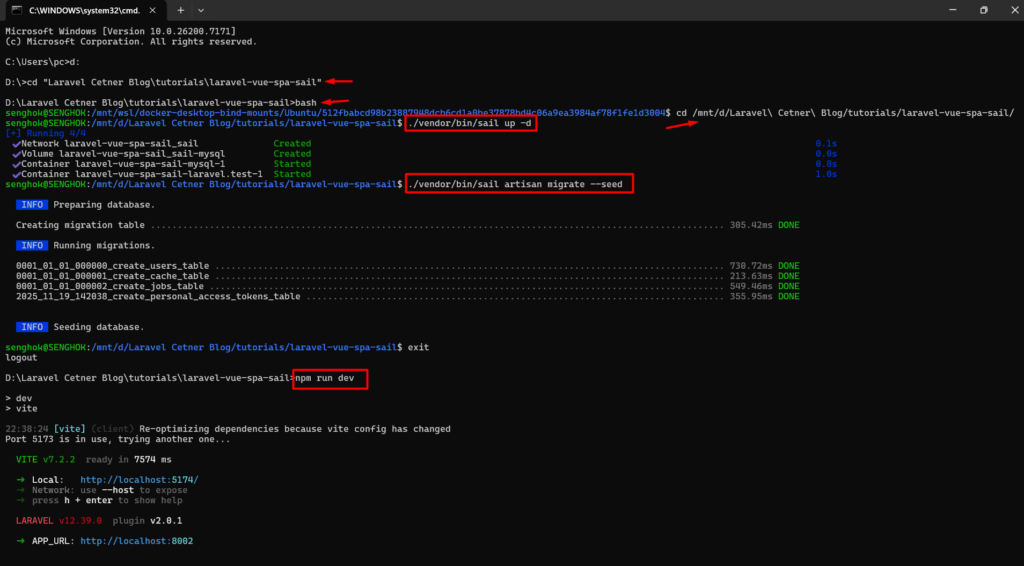
Navigate to Your Project Folder in Ubuntu by opening your Terminal/CMD, go to the project’s root folder, and then run the command below:
cd /path-to-your-project-folderbashcd /path-to-your-project-folderThen run Laravel Sail Commands Inside Ubuntu as below
./vendor/bin/sail up -d./vendor/bin/sail artisan migrate --seedThen exit from Ubuntu terminal, go to the project’s root folder, and then run the command below:
npm run devEverything will work because Ubuntu provides a full Linux environment.
Most Used Laravel Sail Commands
In this section of the Laravel Sail Tutorial, you’ll find the essential commands you’ll use daily—starting containers, running migrations, installing packages, and more.
| Action | Command |
|---|---|
| start docker containers | ./vendor/bin/sail up -d |
| stop | ./vendor/bin/sail down |
| run artisan inside docker | ./vendor/bin/sail artisan migrate |
| composer inside docker | ./vendor/bin/sail composer install |
| npm inside docker | ./vendor/bin/sail npm run dev |
Laravel Sail vs Local PHP Installation
This Laravel Sail Tutorial also compares Docker-based development with a traditional local PHP setup, helping you choose the workflow that fits your project best.
| Feature | Laravel Sail | Local Install |
|---|---|---|
| PHP version | Always latest | Depends on your OS |
| MySQL | Docker container | Manual installation |
| Node.js | Built-in | Needs separate installation |
| Setup time | 1 minute | 30–60 minutes |
| Consistency | 100% across teams | Hard to keep consistent |
| Easy reset | Yes | No |
Conclusion – Laravel Sail Tutorial Summary
This Laravel Sail Tutorial showed you how to set up a simple, Docker-powered environment for running Laravel and Vue.js SPA projects without installing PHP, MySQL, or Node on your machine. With Sail handling everything through containers, your development becomes cleaner, faster, and more consistent across all devices.
If you want to move beyond Sail and learn how to run your project using real Docker containers with full manual configuration, you can continue with my next tutorial on deploying Laravel with a custom Docker setup.