Welcome to Part 1 of our Laravel Vue.js POS Tutorial series, where we walk you through every step of building a powerful Point of Sale system using Laravel and Vue.js. In this guide, we focus on the Laravel Vue.js POS Installation, starting with setting up a fresh Laravel 12 project, connecting your database, and creating a virtual host using WAMP. This series is perfect for beginners and developers who want a clear and structured path to building a complete POS system from scratch.
You can follow along using any operating system—whether it’s Windows, Linux, Ubuntu, or macOS. You’re also free to choose any local development stack such as XAMPP, WAMP, or LAMP. For this tutorial, we’ll be using WAMP Server on Windows because it’s easy to configure and beginner-friendly.
By the end of this part, you’ll have a Laravel app set up with the necessary frontend libraries and tools—ready to move on to the next stage of your Laravel Vue.js POS project.
Table of Contents
Step 1: Install Laravel Framework 12.x
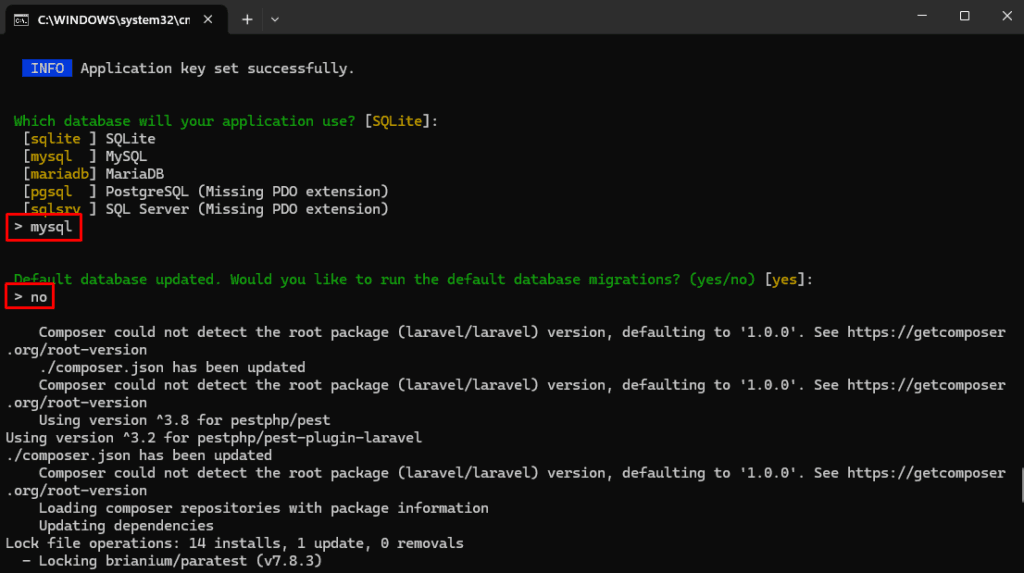
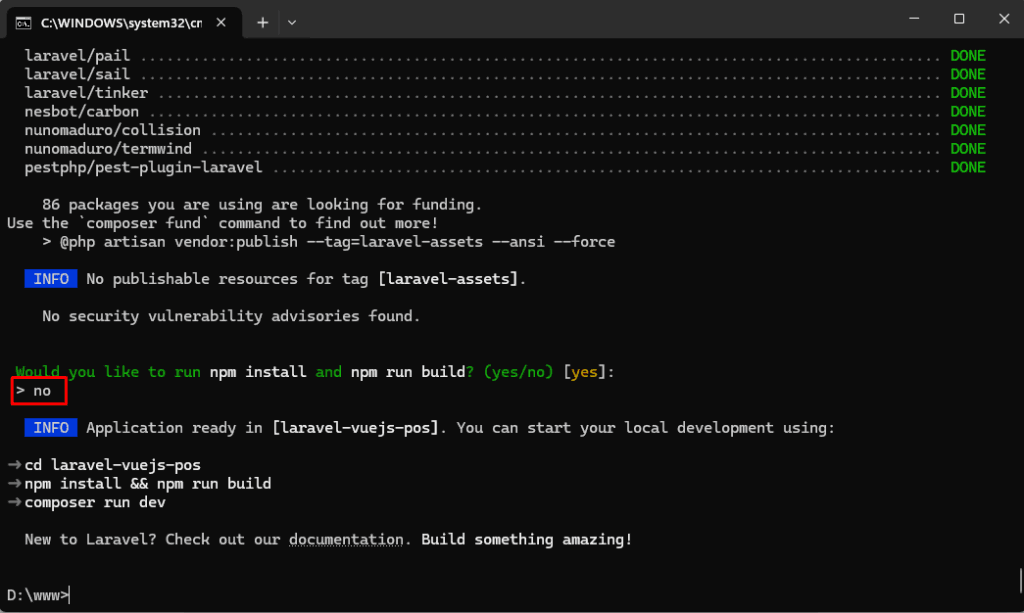
Begin your Laravel Vue.js POS Installation by setting up Laravel 12.x using Composer. We’ll walk you through the commands and structure needed to initialize your project successfully.
You can learn how to install it from the official Laravel docs, check out our earlier tutorial How to Install Laravel Framework 12.x on Windows, or just follow the step-by-step instructions below.
For this tutorial, we’ll assume that you already have Composer and Node.js installed, and you’re running WampServer on port 80. Your Laravel project is located in D:\www, and the project folder is named laravel-vuejs-pos.
Open the Command Prompt (CMD), navigate to your project root directory, and run the following command:
composer global require laravel/installer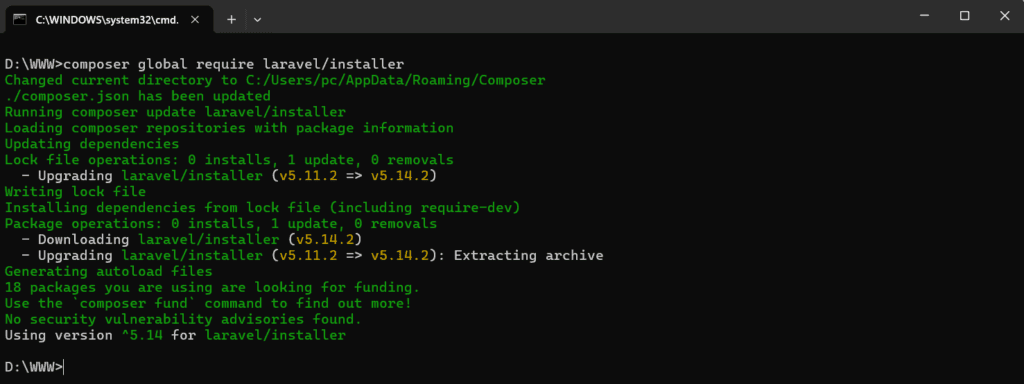
laravel new laravel-vuejs-pos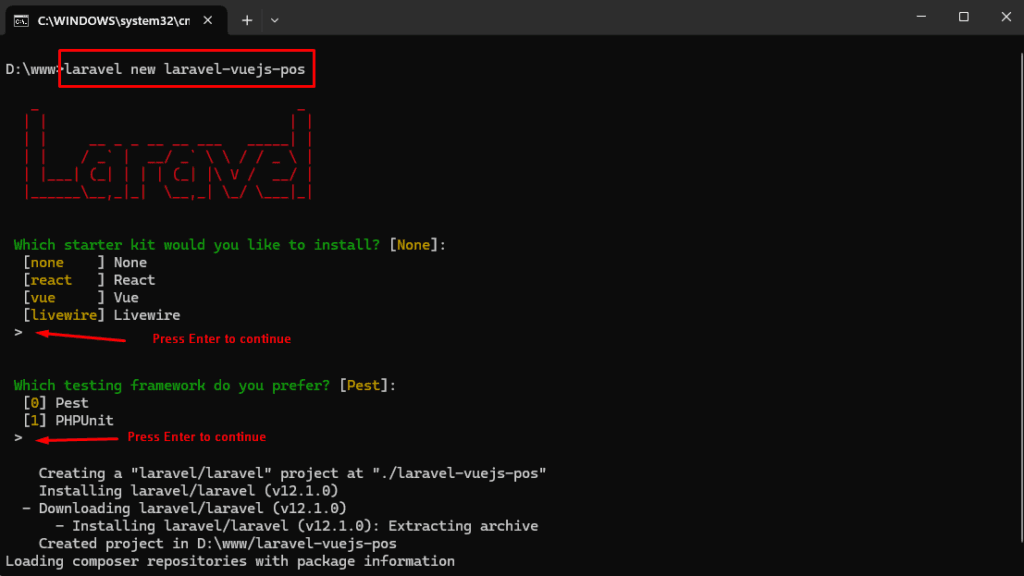
Step 2: Setup Database Connection
Learn how to configure the database for your Laravel Vue.js POS Installation. We’ll update the .env file to connect Laravel to MySQL for storing all your POS system data.
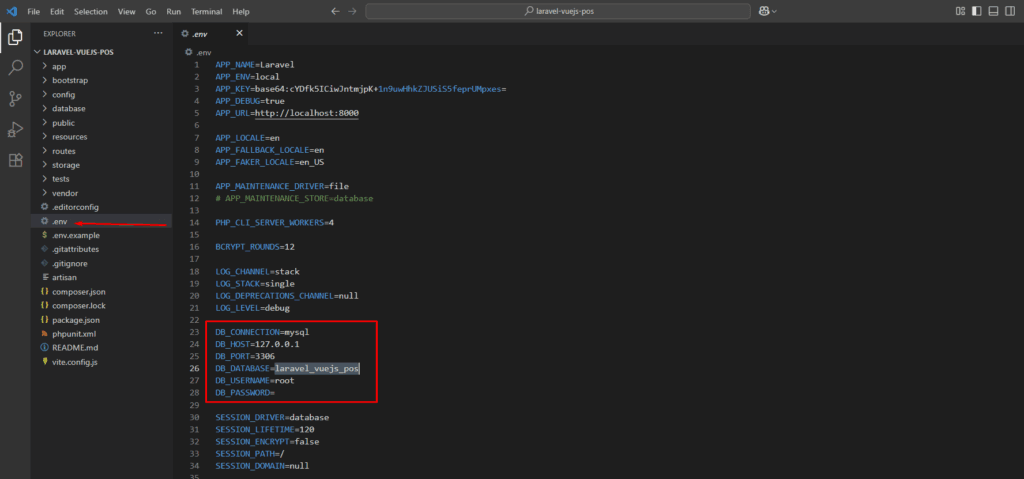
Then create the database manually or with your preferred GUI.
Step 3: Data Migration
In this step, you’ll create and run Laravel migrations to set up the necessary database tables for your POS system. This ensures your Laravel Vue.js POS Installation has a solid and scalable database structure from the start.
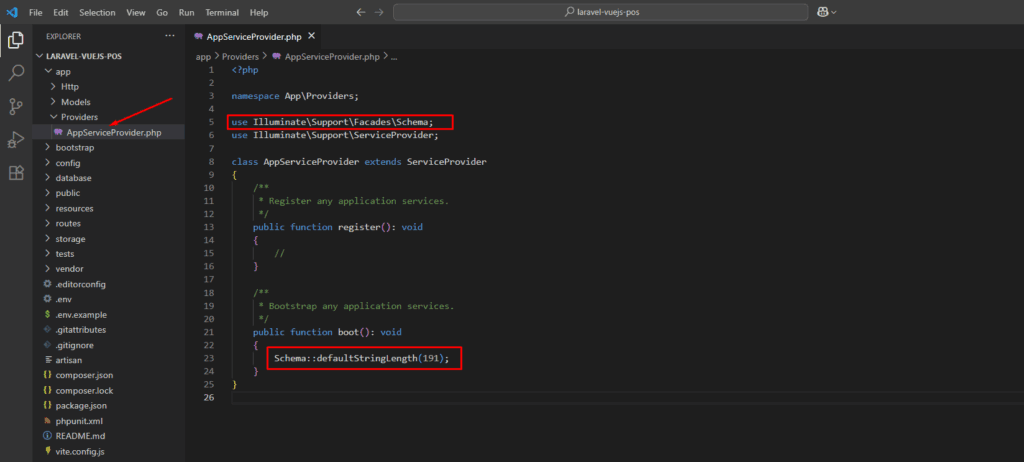
Update this file app/Providers/AppServiceProvider.php follow the screenshot below to avoid database migration issues.
Open the Command Prompt (CMD), navigate to your project root directory, and run the following command:
php artisan migrate:fresh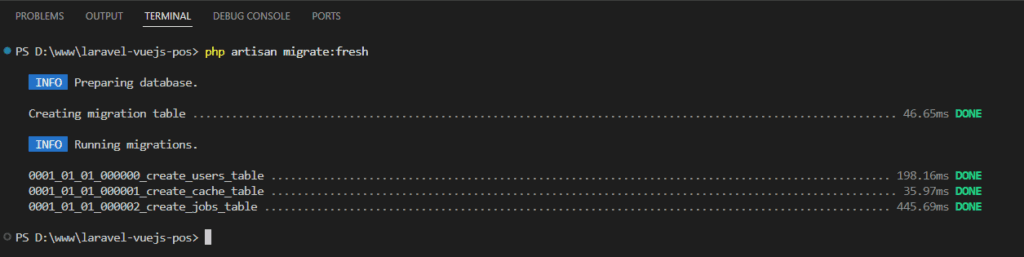
Running and Testing Your Project
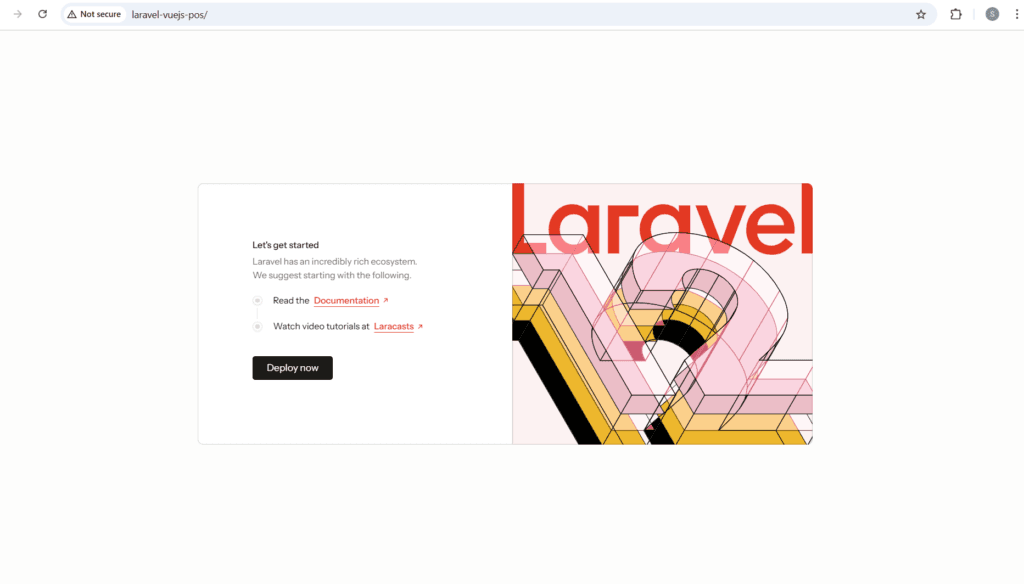
Open your Terminal/CMD in separate windows, go to the project’s root folder, and then run the command below:
npm run devphp artisan serveWith both commands running in their separate windows, open your web browser to the Laravel address (http://127.0.0.1:8000).
Installation Complete
🎉 Congratulations! You’ve just completed the first step of the Laravel Vue.js POS Installation. At this point, you’ve successfully installed Laravel 12.x, configured your environment, and prepared all the essential packages needed to build your POS system.
In the next tutorial, we’ll move on to designing the layout using the NiceAdmin Bootstrap template. You’ll learn how to structure your views, set up reusable components, and start giving your POS system a clean, professional UI.
👉 Continue to Part 2: Create Vue SPA & Integrate NiceAdmin
Laravel Vue.js POS Tutorial for Beginners Series
This step-by-step series will guide you through building a complete Laravel Vue.js POS system from scratch:
- Part 1: Install Laravel Framework
Set up a fresh Laravel 12 project and configure the environment and database for your POS backend. - Part 2: Create Vue SPA & Integrate NiceAdmin
Convert Laravel into a Vue.js SPA with Vue Router, install Vue 3, Bootstrap 5, and integrate the NiceAdmin template for a modern UI. - Part 3: Data Migration & Authentication
Migrate tables for users, roles, and products. Add authentication using Laravel Sanctum. - Part 4: Navigation & CRUD Operations
Build dynamic sidebar navigation and implement CRUD for products, categories, and users using API and Vue components. - Part 5: POS Cart System
Create a POS cart where users can add, update, and remove items using Vue 3’s built-in reactivity. - Part 6: Reports & Sales Filters
Add sales report filtering by date, user, or payment. Enable Excel export and receipt printing. - Part 7: Dashboard with ApexCharts
Display real-time sales data in responsive charts using ApexCharts.